Difference between revisions of "CODA"
From PREX Wiki
Jump to navigationJump to search| Line 1: | Line 1: | ||
| − | == Parity DAQ CODA == | + | == Starting Parity DAQ CODA == |
* Log in as '''apar@adaq1''' | * Log in as '''apar@adaq1''' | ||
* on the terminal type '''startcoda''': 4 xterms will appear and the main CODA window. CODA will automatically load the last configuration used. If you are ok with this then just go to '''Platform->Connect''' | * on the terminal type '''startcoda''': 4 xterms will appear and the main CODA window. CODA will automatically load the last configuration used. If you are ok with this then just go to '''Platform->Connect''' | ||
| Line 11: | Line 11: | ||
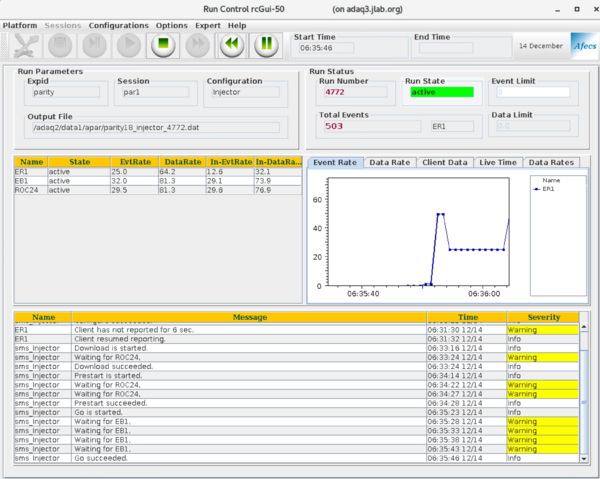
[[File:DAQ_Running.png|600px]] | [[File:DAQ_Running.png|600px]] | ||
* '''End''' (5th icon) | * '''End''' (5th icon) | ||
| + | |||
| + | == Instructions for shift checklist == | ||
Revision as of 16:21, 8 June 2019
Starting Parity DAQ CODA
- Log in as apar@adaq1
- on the terminal type startcoda: 4 xterms will appear and the main CODA window. CODA will automatically load the last configuration used. If you are ok with this then just go to Platform->Connect
- In general go to Configuration->Cool: Select the desired configuration. It will automatically connect the selected configuration
- Configure (the work tool icon top left)
- Download (second icon top left)
- Prestart (third icon): In the previous steps, warnings about waiting for a roc can be ignored if it does not take too long to respond (~10s). Do watch for Error messages. Those cannot be ignored!
- Start (4th icon)
- End (5th icon)


